Download in English | Español | Hmong
This article was originally published by the Tree Canopy Collaborative in Dane County.
Step 1 | Call Digger’s Hotline
Call 811 or visit diggershotline.com to mark under-ground utilities. Check for overhead lines. Make sure to site your tree in a spot that matches its needs

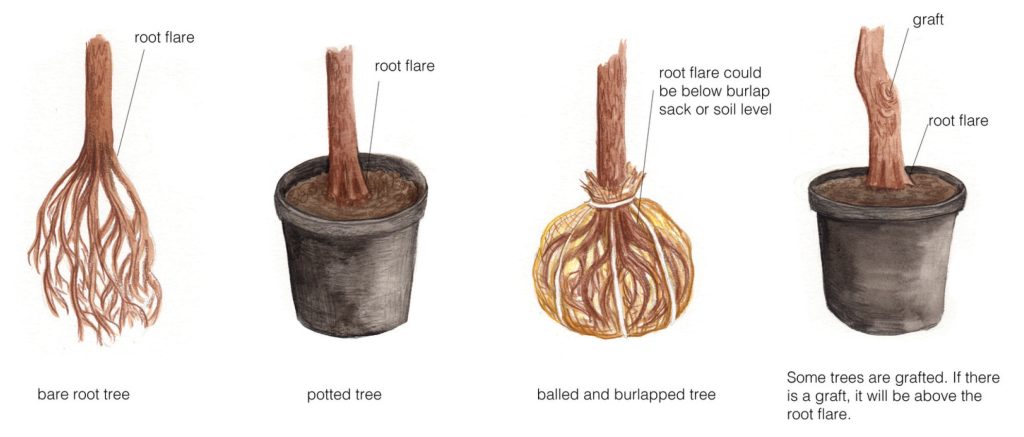
Step 2 | Find the root flare
The root flare is the bulge between the stem and the roots. Be careful not to confuse a graft with a root flare.
Step 3 | Measure for and dig the hole
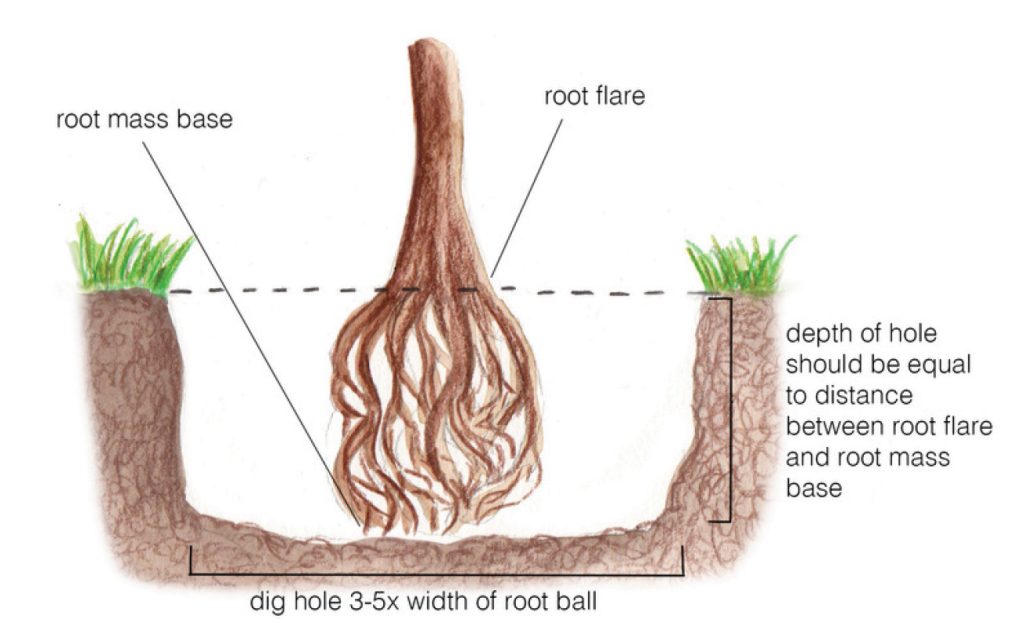
Measure from the root flare to the bottom of the root ball to determine hole depth. Dig the hole 3-5 times the diameter of the root ball.
Step 4 | Set the root ball in hole and water
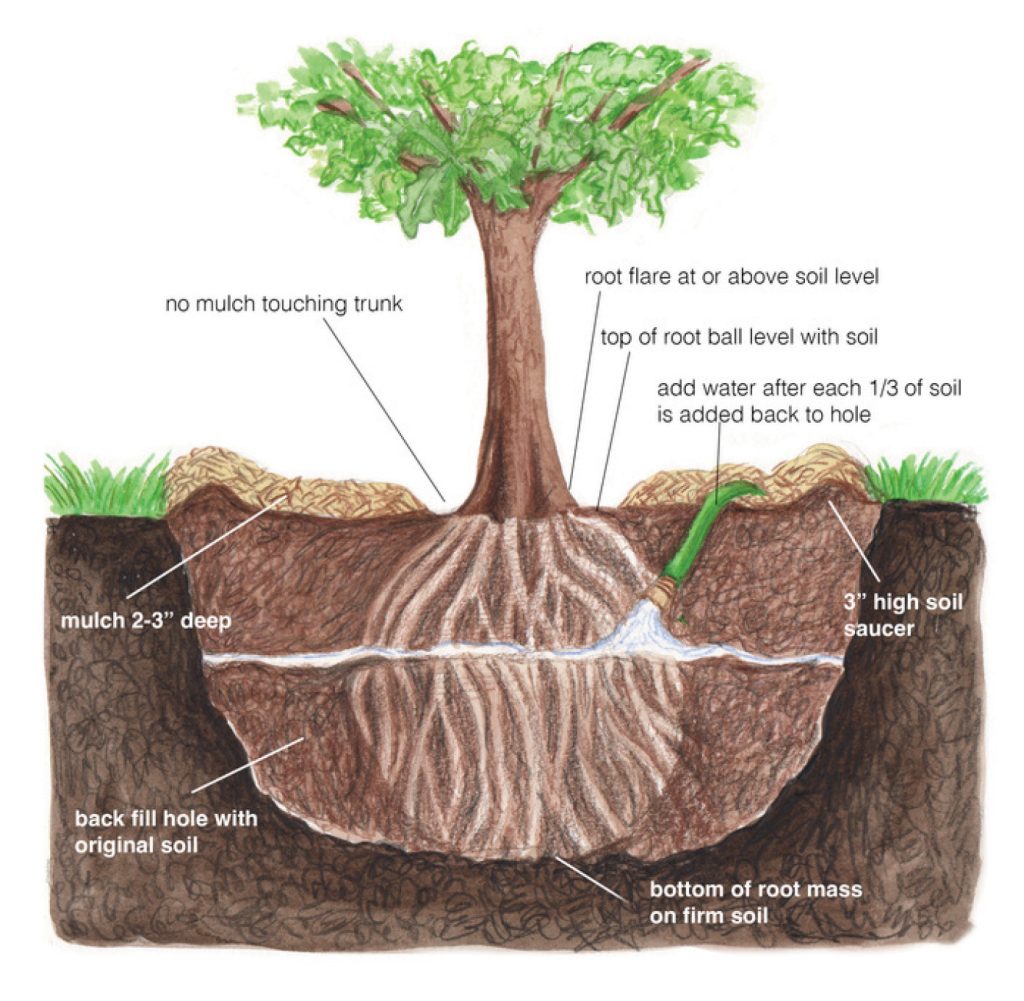
Remove the wire basket, if present. Use a tarp to slide the tree into the hole if the root ball is heavy. Remove burlap (if present). Spread and separate roots if circling. Fill the hole in thirds with soil originally removed. Eliminate any air pockets after each addition. Water and let drain after each soil addition.
Step 5 | Finish Up
- Build a ‘soil saucer’ (narrow berm) at least 3” high around the hole edge for a water reservoir. Fill it with water, and let it drain. Mulch no more than 3” deep inside the saucer area.
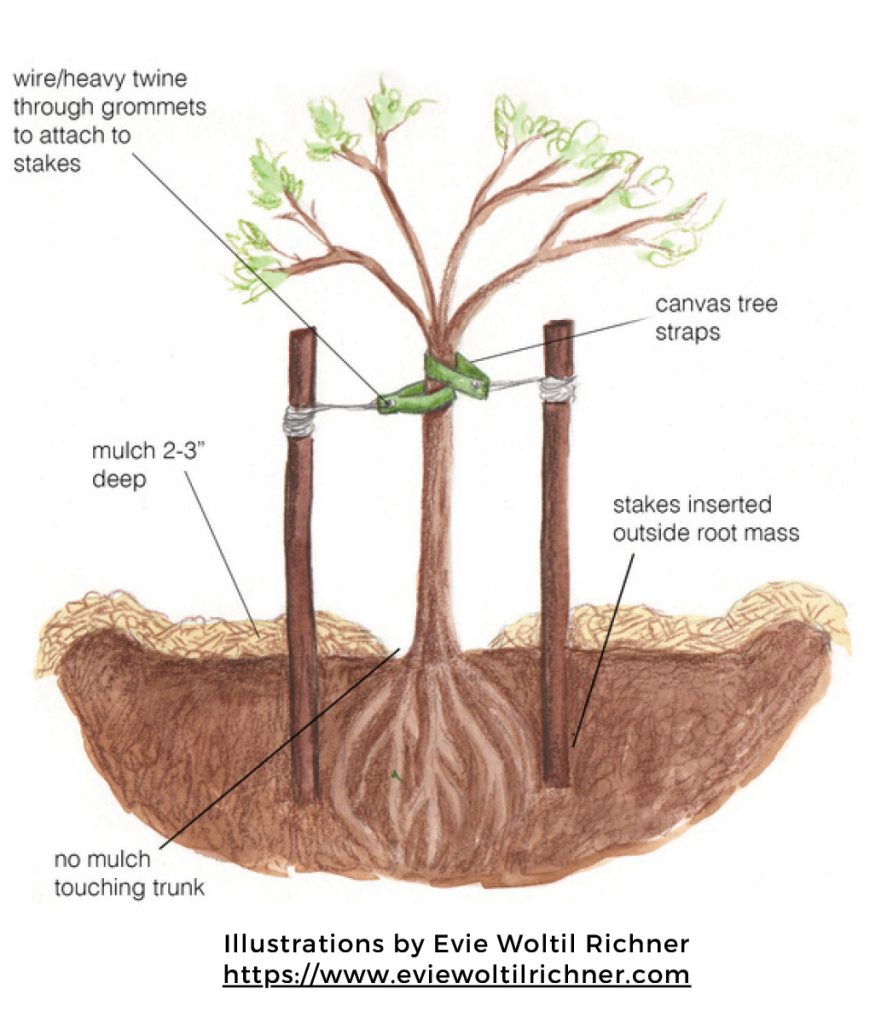
- Mulch should not touch the trunk.
- Stake bare root and small trees for one year only. Install two opposing stakes outside the root mass. Loop flat canvas tree straps with grommets around the trunk. Attach to stakes with wire via the grommets.
Illustrations by Evie Woltil Richner https://www.eviewoltilrichner.com
Download Article




 Tree Species Recommended for Fall Planting
 Gardening for Weather Extremes in Wisconsin: Extreme heat and drought
 Gardening for Weather Extremes in Wisconsin: Extreme Precipitation
 ▶︎ Watch: Powdery Mildew Home Remedies