Overview
Home composting is an easy and inexpensive way to create a valuable soil amendment from yard and household waste. Composting means less waste going into the landfill and less need for chemical fertilizers.
While many people simply pile their compost in a heap, others may want to use a bin to contain their compost and speed up the composting process. Compost bins vary in size, use, and cost, whether you purchase a commercial product or build one yourself. This Do-It-Yourself Compost Bin series provides you with all you need to know to build your very own compost bin.
Wood & Wire Composter
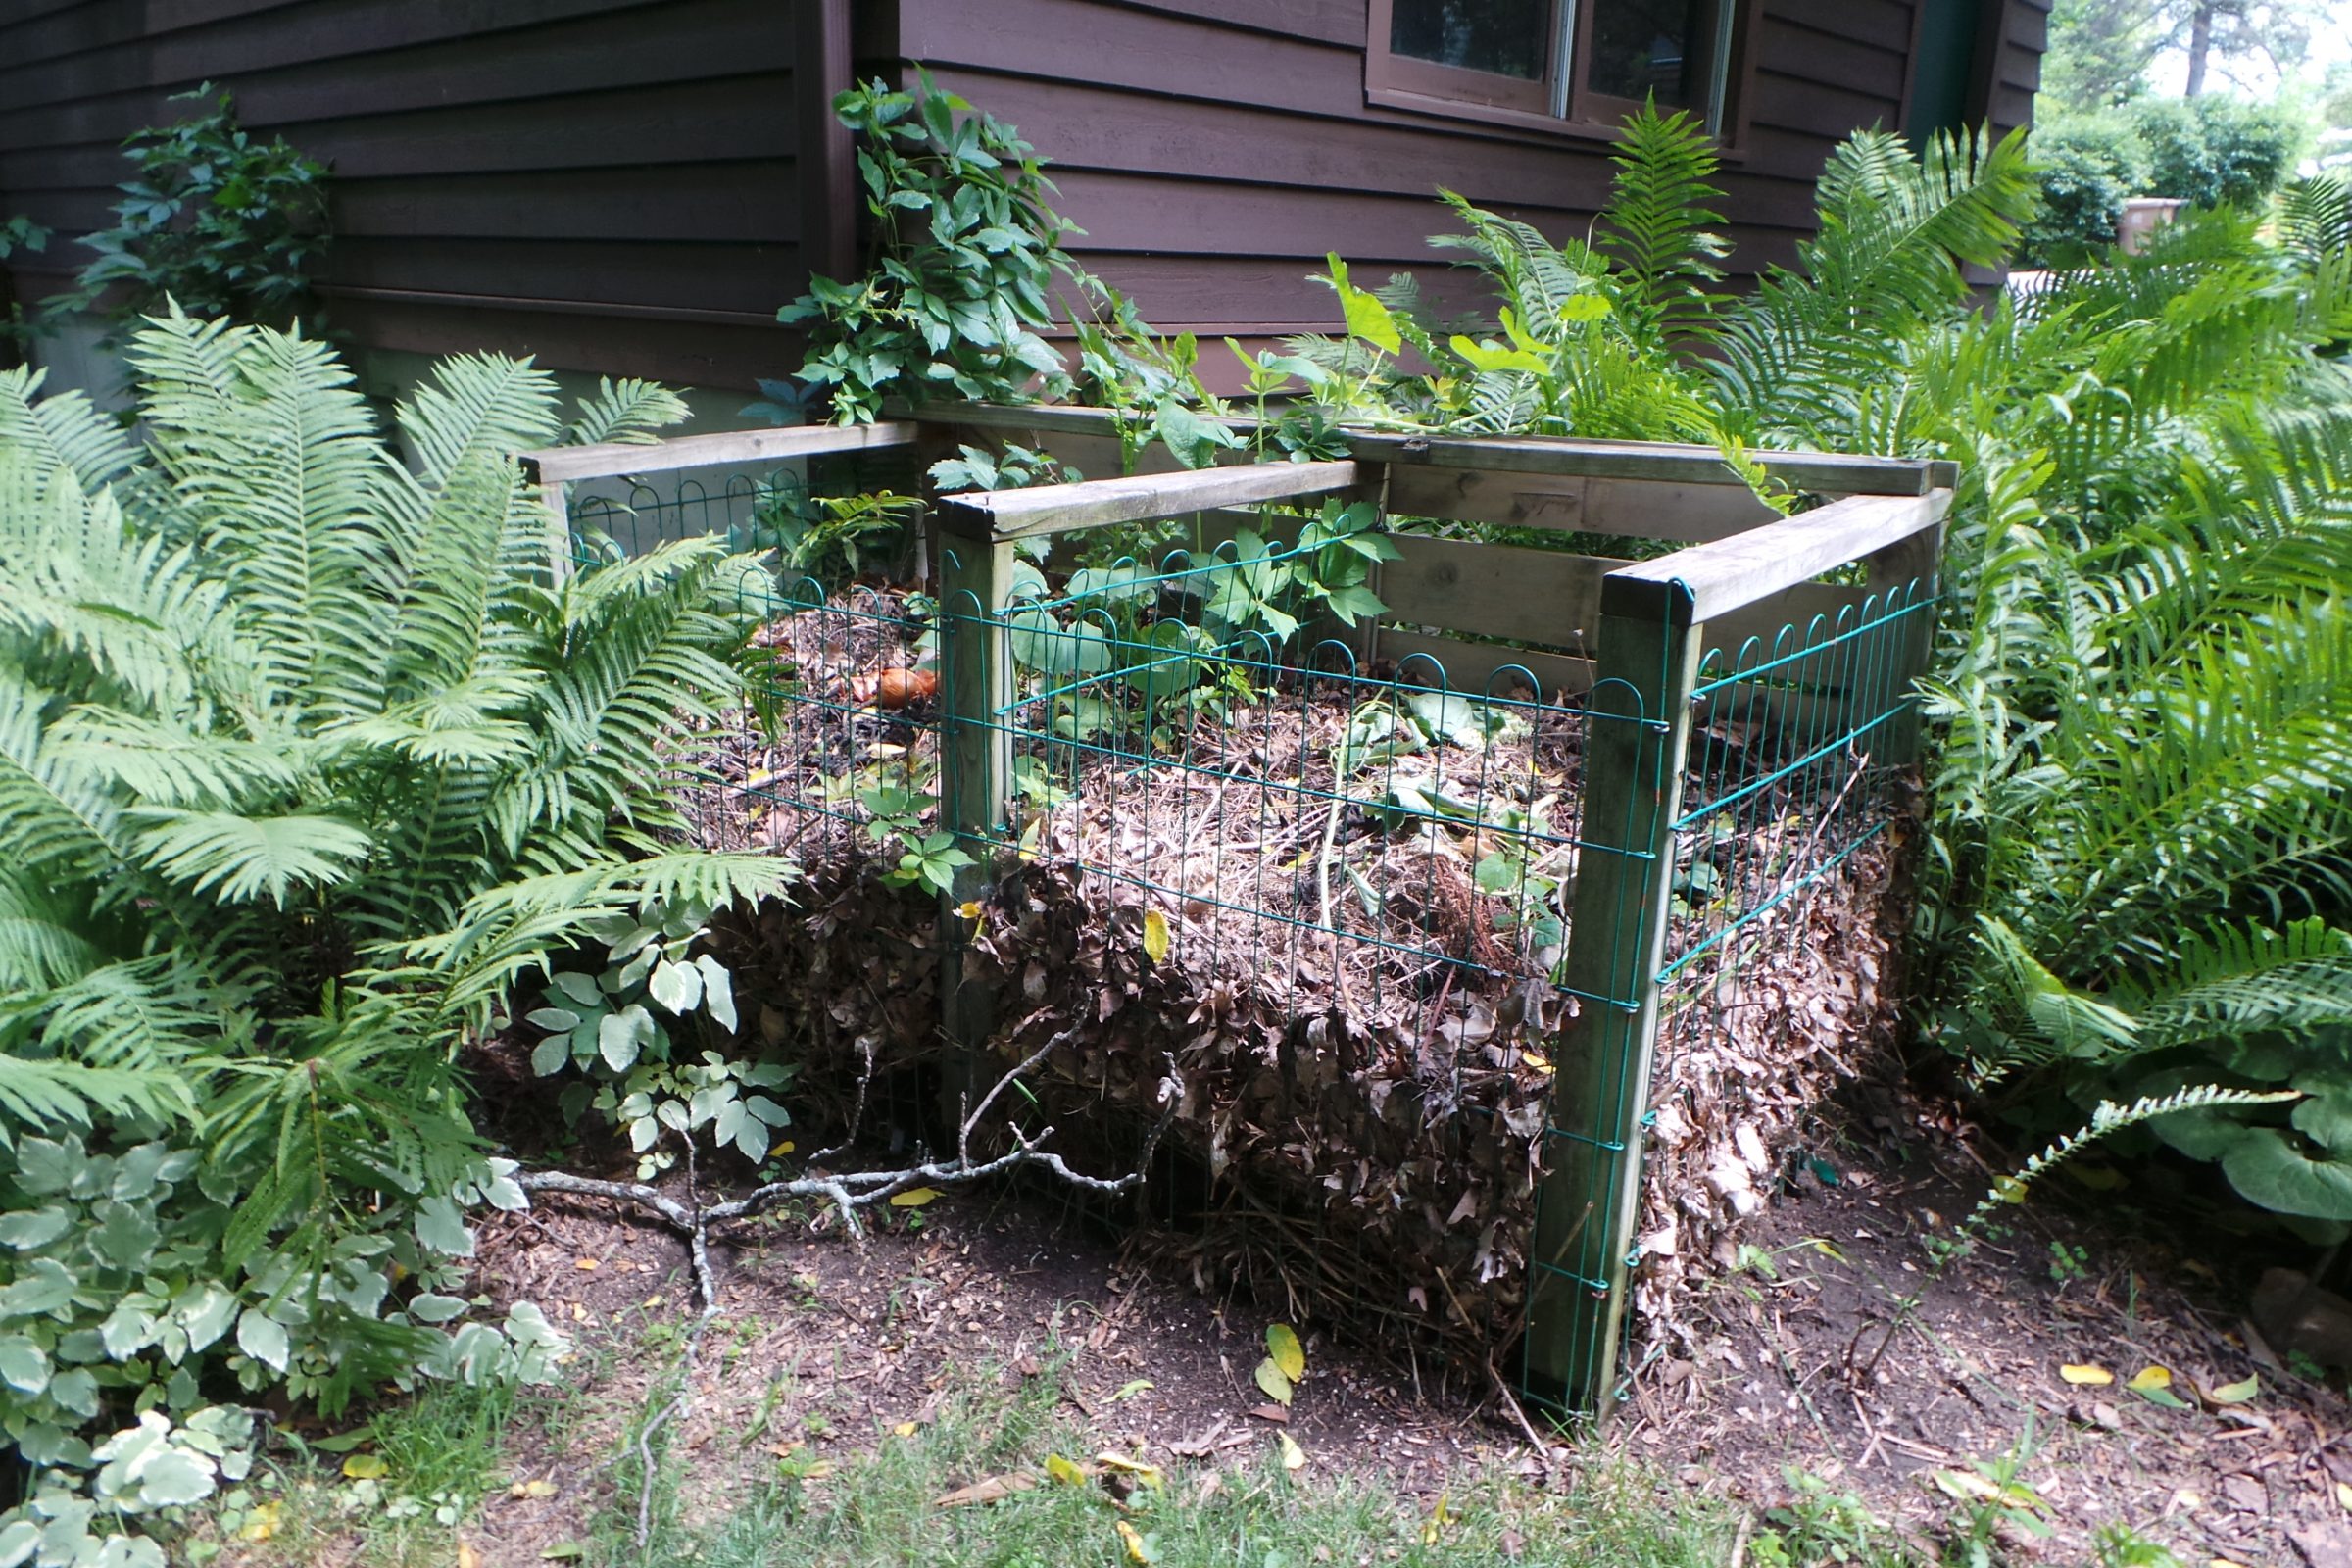
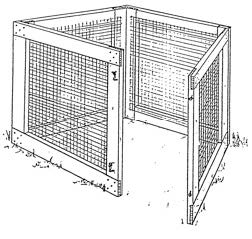
This portable bin (figure 1) provides a convenient way to compost yard materials. It fits well in small spaces and may be used either as a holding bin or as a portable turning unit. To turn the pile, harvest the finished compost, or build a new pile, simply undo the latches, pull the sides apart, and move the bin. To turn the pile, simply transfer the composting materials back into the empty bin at its new location.
Cost: $$
Capacity: Eight to ten 30-gallon bags of
yard materials
Degree of difficulty: ✪ ✪ ✪
Above-average building skills needed
How to Construct
Materials
- Four cedar or non-arsenic pressure-treated 2 x 4s, 12’
- ½” hardware cloth, 36” wide, 12’
- 100 galvanized No. 8 wood screws, 1½”
- Four galvanized butt door hinges, 3”
- 150 poultry wire staples or power stapler
- One tube exterior wood adhesive, 10 oz.
- Four large hook-and-eye gate latches
Tools
- Hand saw and chisel, radial arm saw with dado blade, circular saw, or table saw
- Hammer
- Screwdriver
- Tin snips
- Caulking gun
- Pencil
- Small carpenter’s square
- Eye and ear protection
Construction details
- Cut each 12’ 2 x 4 into four 3-foot-long pieces.
- Cut a ¾”-deep and 3½”-wide section out of each end, for a total of 32 lap cuts.
- If using handsaw and chisel: Cut ¾” down at the 3½” line at A (figure 2). Then cut a deep groove into the end of the board at B. Place a thick wood chisel in the end of groove and split the wood with a hammer to the 3½” cut.
If using a radial alarm saw, circular saw, or table saw: Set the blade depth to ¾” and make multiple passes until the whole 3½” section is removed.
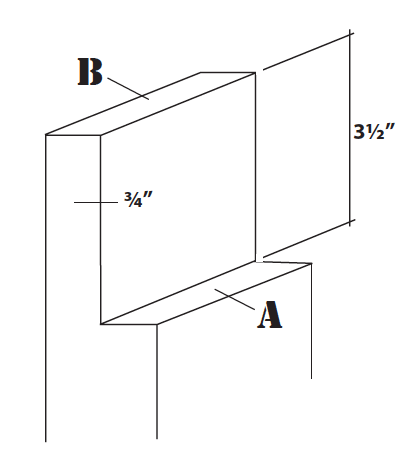
Figure 2. Section detail
- Make four 3-foot square frames from the lap-jointed 2 x 4s. Add enough wood adhesive to fill the gaps when the lap joints are screwed together. Fasten each joint with five screws.
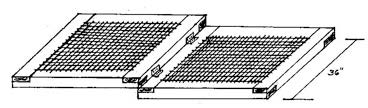
- Use tin snips to cut the hardware cloth into four 3-foot-square sections. Bend the edges of the cloth back over 1” for strength. Lay one onto each of the four frames. Center and tack each corner with a poultry wire staple. Hammer staples in every 4” along all four edges of the hardware cloth. Try to hold the cloth taut so it will not sag when filled with compost.
- Connect each pair of frames together with two hinges, so the wire is on the inside of the bin, as shown (figure 3).
- Finally, put the hook-and eye-gate latches on the other ends so that the sections latch together.
Conclusion
Now you are ready to set your bin out in your yard and begin composting! Learn more about making and using compost in the garden as you get started.
Authors: Joe Van Rossum, former Recycling Specialist and Director at the Solid & Hazardous Waste Education Center (SHWEC)
Rev: 2013
Item number: G4020-05
References
Source: Adapted with permission of the Seattle Engineering Department’s Solid Waste Utility and the Seattle Tilth Association.
Composting to Reduce the Waste Stream (NRAES-43) Plants and Life Sciences Publishing (PALS), Cornell Cooperative Extension http://palspublishing.cals.cornell.edu/ nra_order.taf?_function=detail&pr_ booknum=nraes-43
Master Composter Resource Manual Cornell Waste Management Institute cwmi.css.cornell.edu/ mastercompostermanual.pdf