Training and Pruning Apple Trees
Introduction
Pruning vs. Training
Training Young Trees
Pruning Bearing (Mature) Trees
Pruning Procedure
Author(s): Josie Dillon, Fruit Outreach Specialist and T.R. Roper, Extension Fruit Crop Specialist
Rev: 05/2025
Introduction
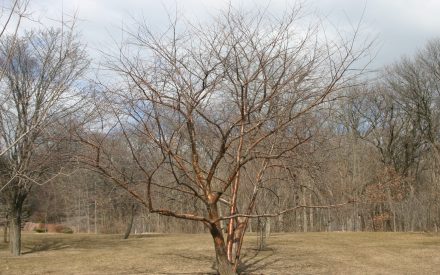
Apples are the most common fruit tree planted in Wisconsin. In addition to providing fruit, apple trees can be a pleasing addition to the home landscape. However, unlike most shade trees, apple trees require annual training and pruning from the time of planting to produce an attractive and productive tree.
Proper training and pruning are also a valuable part of an effective pest management program. Pruning to open up the canopy improves air flow, reducing some disease problems. An open canopy also allows better access for managing insect pests.
Training and pruning cannot compensate entirely for poor horticultural factors such as poorly matched scions (the above-ground portion of the tree) and rootstocks. For example, if a strong spur-type scion, which produces little vegetative growth, is grafted to a dwarfing rootstock, the resulting tree will “runt out.” That is, it will produce little new growth and small fruit, regardless of how it is pruned. On the other hand, a vigorous scion on a standard or semi-dwarf rootstock planted in a fertile soil will become a large, unmanageable tree that cannot be pruned into submission.
Pruning vs. Training Apple Trees
Many people rely on pruning only to shape apple trees. While pruning offers many benefits, it limits the grower’s options to removing branches only. Often, the remaining branches aren’t in an ideal position for maximum fruit production. Training, by contrast, allows the grower to shape the tree through branch positioning and pruning. Well-trained trees produce more fruit of higher quality than those that have not been trained.
Training begins when a tree is planted and continues throughout the life of the tree. Training a tree properly during its first few years can save many hours of difficult, corrective pruning as the tree ages.
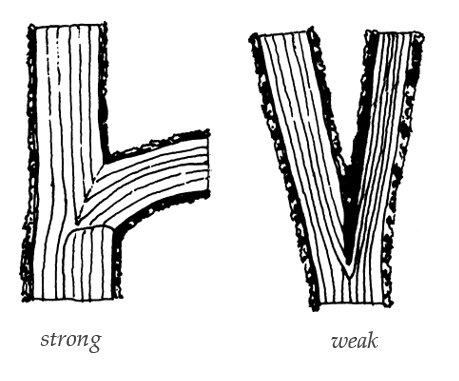
Limb positioning is important because it determines whether the branch will produce primarily fruit or vegetation (figure 1). When branches grow straight up, they produce mostly vegetative growth and very little fruit. By contrast, branches that grow straight out from the tree are very fruitful, but produce little new vegetative growth. The ideal limb position is about 30° above horizontal, creating a 60° crotch angle. This allows maximum fruit production while still promoting growth of new wood for future fruiting. In addition, branches having a wide angle between the limb and the trunk, the crotch angle, are stronger than upright branches with narrow crotches (figure 2). Branches are most easily positioned when they are only 3–6 inches long with very soft wood.
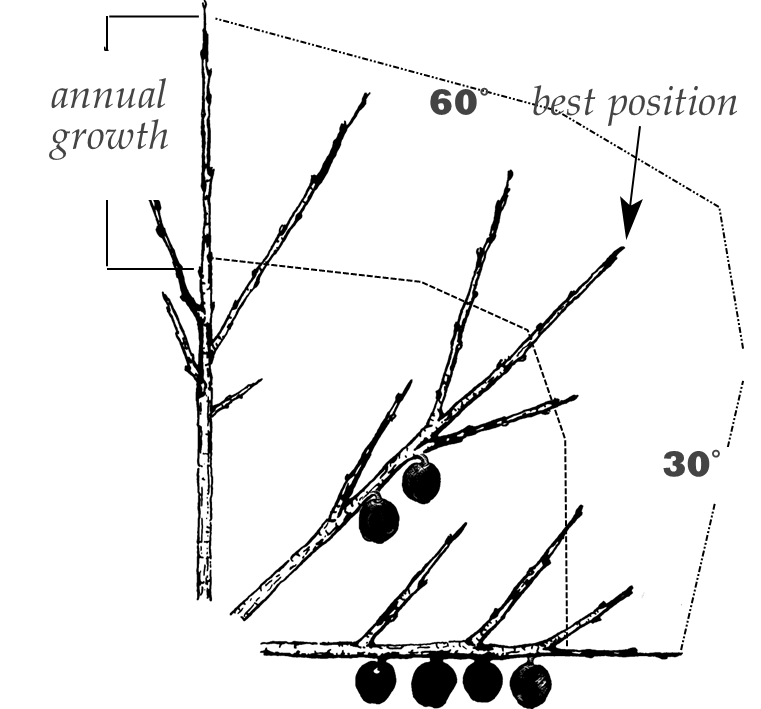
Adapted from Oberhofer, H. 1990. Pruning the Slender Spindle. BC Ministry of Agriculture and Fisheries, Victoria, BC Canada
Pruning should be used to open “windows” to allow light to penetrate throughout the tree. When all of the leaves are exposed to more light, the tree is able to produce higher quality fruit. However, be careful not to remove too many branches, as pruning can stimulate excess regrowth. When a portion of a branch is removed, the tree responds by producing new growth. Often three or four branches will grow where only one grew before, resulting in a “grow and cut” cycle. While excess regrowth can be minimized through proper cuts and by cutting into older wood where possible, it cannot be entirely avoided.
Training Young Apple Trees
The objective in training a young tree is to develop a structure that will provide a strong framework to support fruit production. The top of the tree should be smaller and narrower than the bottom of the tree. This shape prevents the top of the tree from shading the bottom of the tree. The central leader system (illustrated below) produces a vertical central leader or main stem and strong, properly spaced scaffold limbs. This system is easy to prune and provides optimum production potential.
Over the years, you will train two to three tiers of scaffold branches. These branches will form the central framework of the tree and should grow at a wide angle from the leader.
At Planting
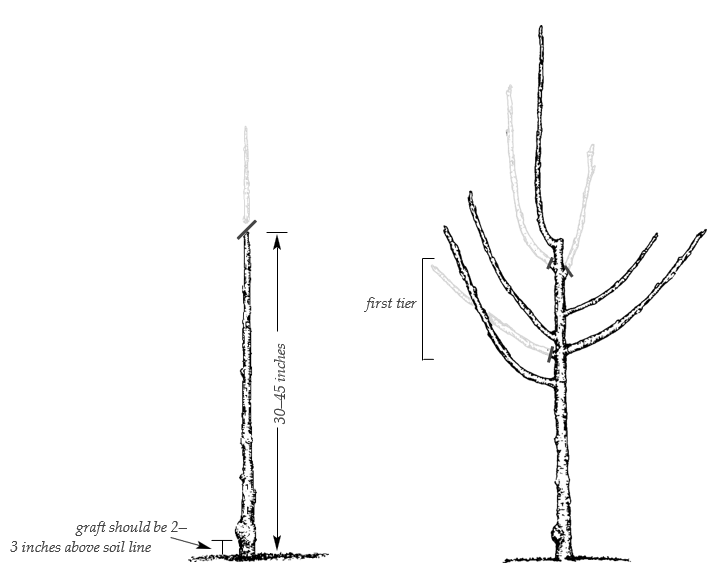
If you plant an unbranched whip tree, cut off the top, leaving the tree 30–45 inches tall. Side branches will grow from the whip the first year. New branches will grow just below this cut. You control the location (height) of the new limbs by the height of the cut. If you’ve purchased branched trees, remove only limbs that are broken, damaged, poorly positioned, or that are too low on the trunk.
Year 1
During the first summer, choose four or five good branches for the lowest tier of scaffolds. The lowest scaffold limb should be at least 24 inches above ground and can be as high as 36 inches in a landscape where flowers or bushes under the trees are desired. Limbs growing closer to the ground make it difficult to work around the tree. Select well-spaced branches growing within about 18 inches of the lowest branch that are growing neither exactly opposite nor directly above one another. For the first dormant pruning in late spring, remove weak or poorly positioned limbs that will not become scaffolds.
Years 2-3
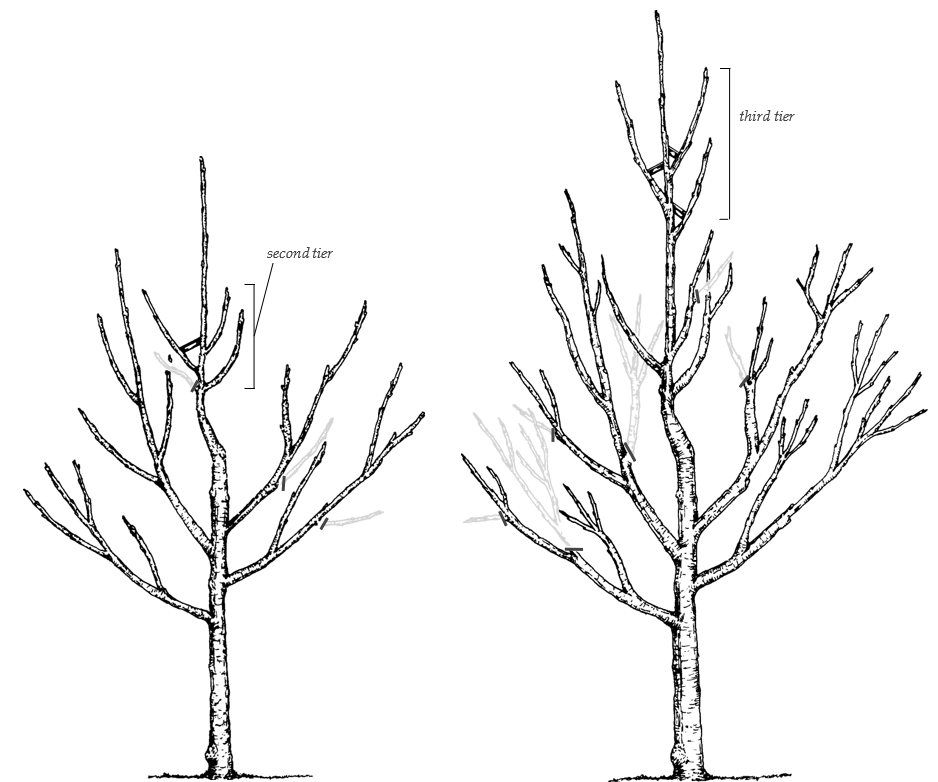
After two or three years, select a second tier of scaffold limbs. Again, choose or create branches with wide crotch angles. The lowest branch of the second tier should be at least 24 inches above the top branch of the lower tier. This 24-inch gap allows light to penetrate into the canopy and to strike the lower tier of branches. The upper branches must be kept shorter than the lower branches to keep them from being shaded. This will create a “Christmas tree” shape. For dwarf trees, two tiers will be sufficient; for semi-dwarf trees, repeat the process to create a third set of scaffolds near the top of the tree.
Yearly Maintenance
The central leader must remain the tallest part of the tree. The highest point in the tree is dominant and most vigorous. If a side branch is becoming nearly as tall as the leader, bend it lower (see limb positioning) or prune it back into 2- year-old or older wood.
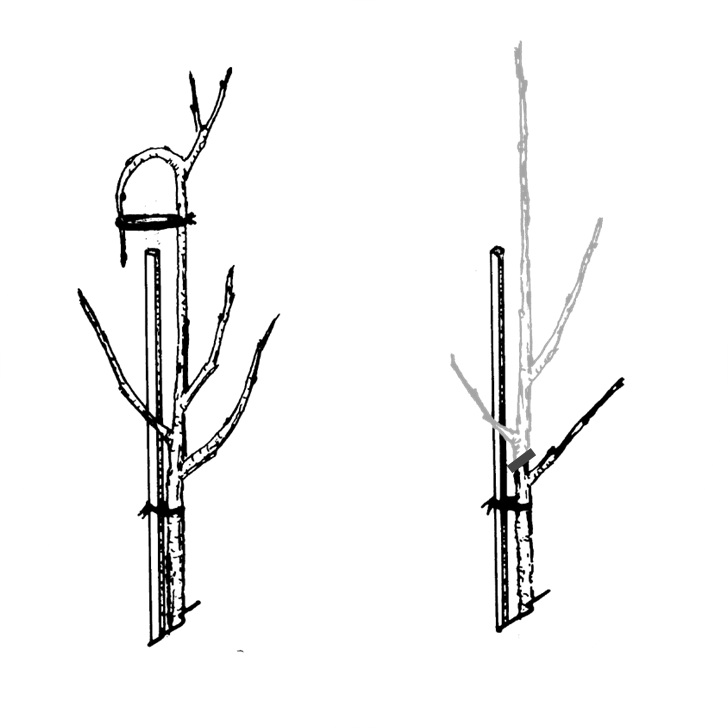
Once the central leader reaches the height you want (usually 8–10 feet high for dwarf or 12–16 feet high for semi-dwarf) you can adjust the vigor in one of two ways. Take the top, supple part of the leader, bend it in an arc and tie it to the support post or the stronger part of the tree. As new branches begin to grow on the arc, remove the ties and allow the leader to return to the vertical position. Alternatively, cut off the leader just above a weak side branch. Both techniques reduce the vigor of the top of the central leader. To maintain the tree height, follow one of these techniques every year for the life of the tree.
Remove all dead and broken branches annually, as well as suckers, water sprouts, and branches forming narrow angles. By the fifth year, trees should be well established with two tiers of scaffolds. Spurs should be developing throughout the tree to provide annual fruiting.
Pruning Bearing (Mature) Apple Trees
The objective of pruning bearing trees is to maintain maximum production of high-quality fruit on a continuing basis. Properly trained trees require little pruning but must still be pruned annually. Limit pruning of bearing apple trees to removal of weak, unproductive branches to improve light penetration and distribution, reduce tree height, and improve spray coverage.
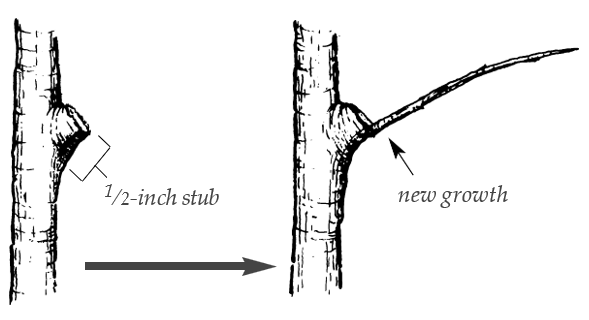
As trees grow older, you may need to make more thinning cuts. Don’t let the upper branches grow longer than the lower branches. Long upper branches shade lower branches and reduce productivity. If necessary, prune upper branches into 2-year-old or older wood to keep them shorter than lower branches. Thin out weak, unproductive branches, and keep the tree “open” for good light penetration. In the top of the tree, branches can be cut back to the trunk leaving a short stub (about 1 ⁄ 2 inch long) on the bottom of the cut (figure 3). A new branch will often grow from the base of the stub.
If an older tree is too tall for convenient spraying and harvesting, more drastic steps must be taken. To lower the height of a tree, completely remove one or two of the tallest growing limbs. Make the cut where the limb joins the trunk. When you prune drastically, you must greatly reduce other pruning in the tree that year. Over-pruning will stimulate too much growth and lower fruit production. Spread out extensive renovation pruning over 2–3 years.
Trees that have not been managed or pruned for several years are generally not reclaimable. The large cuts that are required to allow light and air into the canopy will produce much vegetative vigor that will require even more pruning, creating a vicious cycle. You will be better off to remove the old trees and replace them with young trees on dwarfing rootstocks.
Pruning Procedure
To prune apple trees efficiently, follow these steps:
- Cut off water sprouts growing on the trunk and scaffold limbs. Occasionally, a water sprout may be left to fill in an open area.
- Remove broken and diseased branches.
- Remove the weakest of crossing or closely growing parallel limbs.
- Remove all limbs or spurs growing downwards.
- If the tree needs more branch thinning, remove weak, spindly branches first. Remove dense or long growth from the upper portions of the tree which shade lower limbs. Limbs growing within arm’s reach are easier to harvest and spray.
Remember these tips when pruning apple trees
- Light is required for quality fruit.
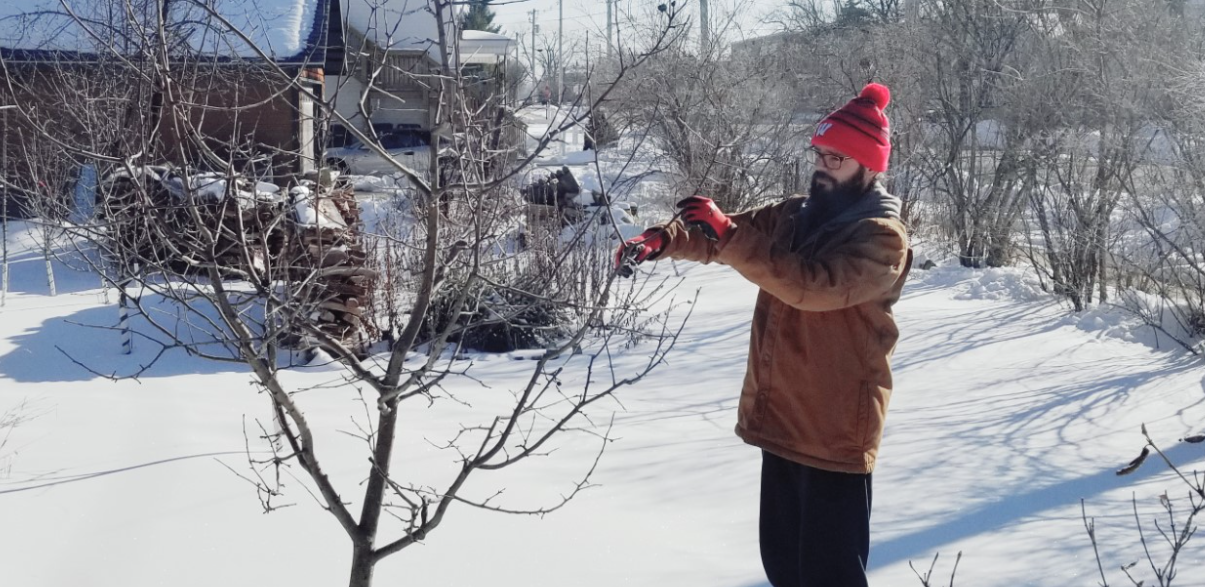
- Prune during the dormant period, late winter or early spring. March and April are best.
- Use tools made specifically for pruning and keep them sharp and clean.
- Make all cuts smooth and close. Leave the collar but not a stub (except for branch renewal).
- On cultivars that bear heaviest on alternate years, do heavy pruning just before the bearing season.