Homegrown Tomatoes for Wisconsin
Authors: H.C. Harrison, UW-Madison and Kristin Krokowski, Commercial Horticulture Educator
Rev: 04/2017
Item number: A1691
Introduction
Tomatoes are the most common crop grown by Wisconsin gardeners. In addition to their beauty and the enjoyment of growing food, the flavor and nutritional benefits of tomatoes make them well worth the effort. Understanding a few basics about tomatoes can help increase your yield and success with your tomato crop.
Read on for tips to find, interview, and select the right attorney for your farm’s legal needs.
Choosing the right tomato
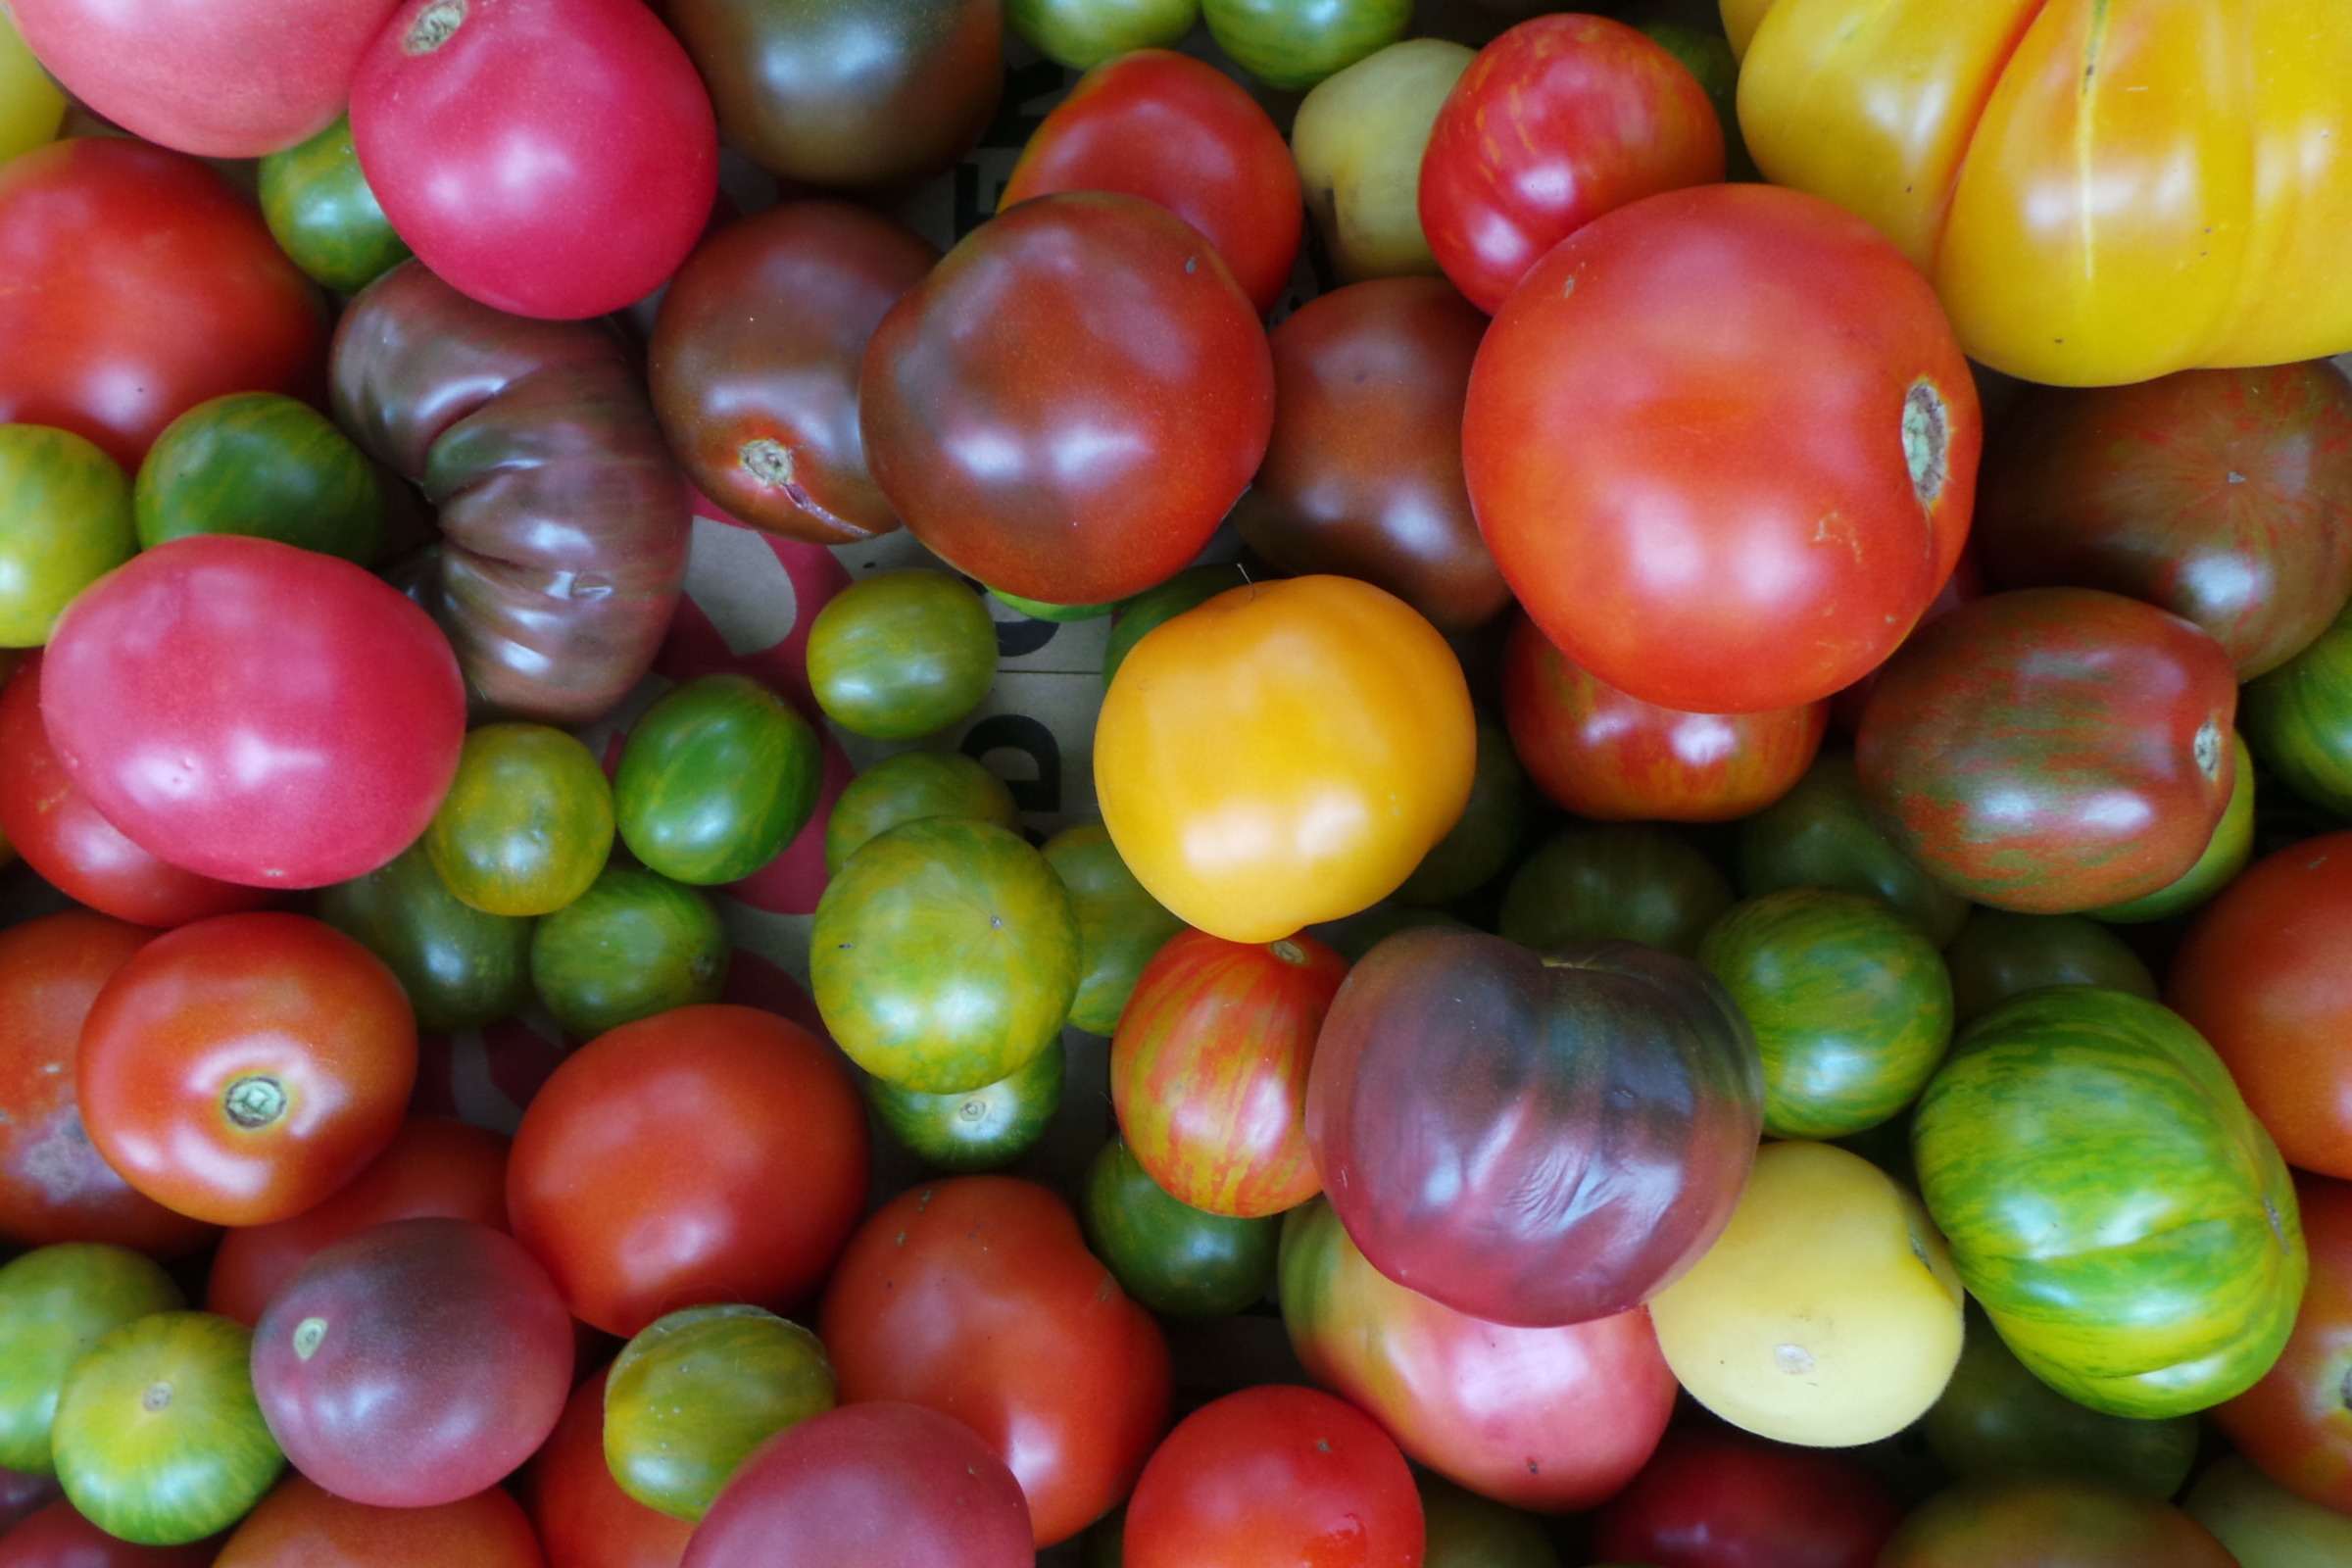
There are so many different colors, sizes, and shapes of tomatoes that it can be difficult to choose which ones to grow. A good starting point is to be sure to choose cultivars (also called varieties) that are a good fit for your location—specifically in the amount of time they take to mature. Tomatoes are a long-season crop, which means that they require a relatively long, frost-free growing season. Gardeners in northern areas of the state, where the growing season is shorter, will do well to select tomato cultivars that will be ready to harvest in fewer days. Gardeners in southern areas of the state will have a bit more flexibility in choosing cultivars.
Another important consideration is whether you would prefer a hybrid tomato or an open-pollinated tomato. Hybrid tomatoes have been bred for certain characteristics such as disease resistance, taste, or size. The seeds from a hybrid tomato will not consistently grow plants that are the same as the parent plant. Open-pollinated plants tend to be prized for their flavor and uniqueness. As a result, open-pollinated tomatoes, including older open-pollinated heirloom varieties, are more susceptible to disease. However, if you collect and save the seeds, the plants that grow from them will be similar to the parent plants.
The growing habit of the plant is another characteristic to consider. Tomato plants can be determinate or indeterminate. Determinate tomato plants have a shrub-like growth habit. These plants tend to have fruit that ripens within a short period of time, and they require less staking. Indeterminate tomatoes continue to grow from the end of the vine throughout the season and have a sprawling growth habit. Indeterminate tomatoes continually add new fruit throughout the season, extending the harvest. However, staking, caging, or trellising indeterminate tomatoes is strongly recommended to maximize the harvest and prevent disease.sharing your concern with them or interviewing other attorneys.
Recommended cultivars
Once you have narrowed your choices based on the characteristics you desire, you will still have many cultivars to choose from. It is best to grow several cultivars of different types and maturities to help ensure a continuous supply of fruit during the growing season and protect against disease.
Early tomatoes
- Sub-Arctic Plenty (mature in 45 days)
- Mountain Spring (65 days)
- Early Girl (54 days)
- Quick Pick (60 days)
- Early Cascade (60 days)
Main crop tomatoes
- Red tomatoes: Better Boy, Big Boy, Celebrity, Wisconsin 55, Defiant, Mountain Magic, others from the Mountain series
- Yellow tomatoes: Mountain Gold, Lemon Boy, Jubilee, Golden Boy
- Pink tomatoes: Mountain Belle, Pink Girl
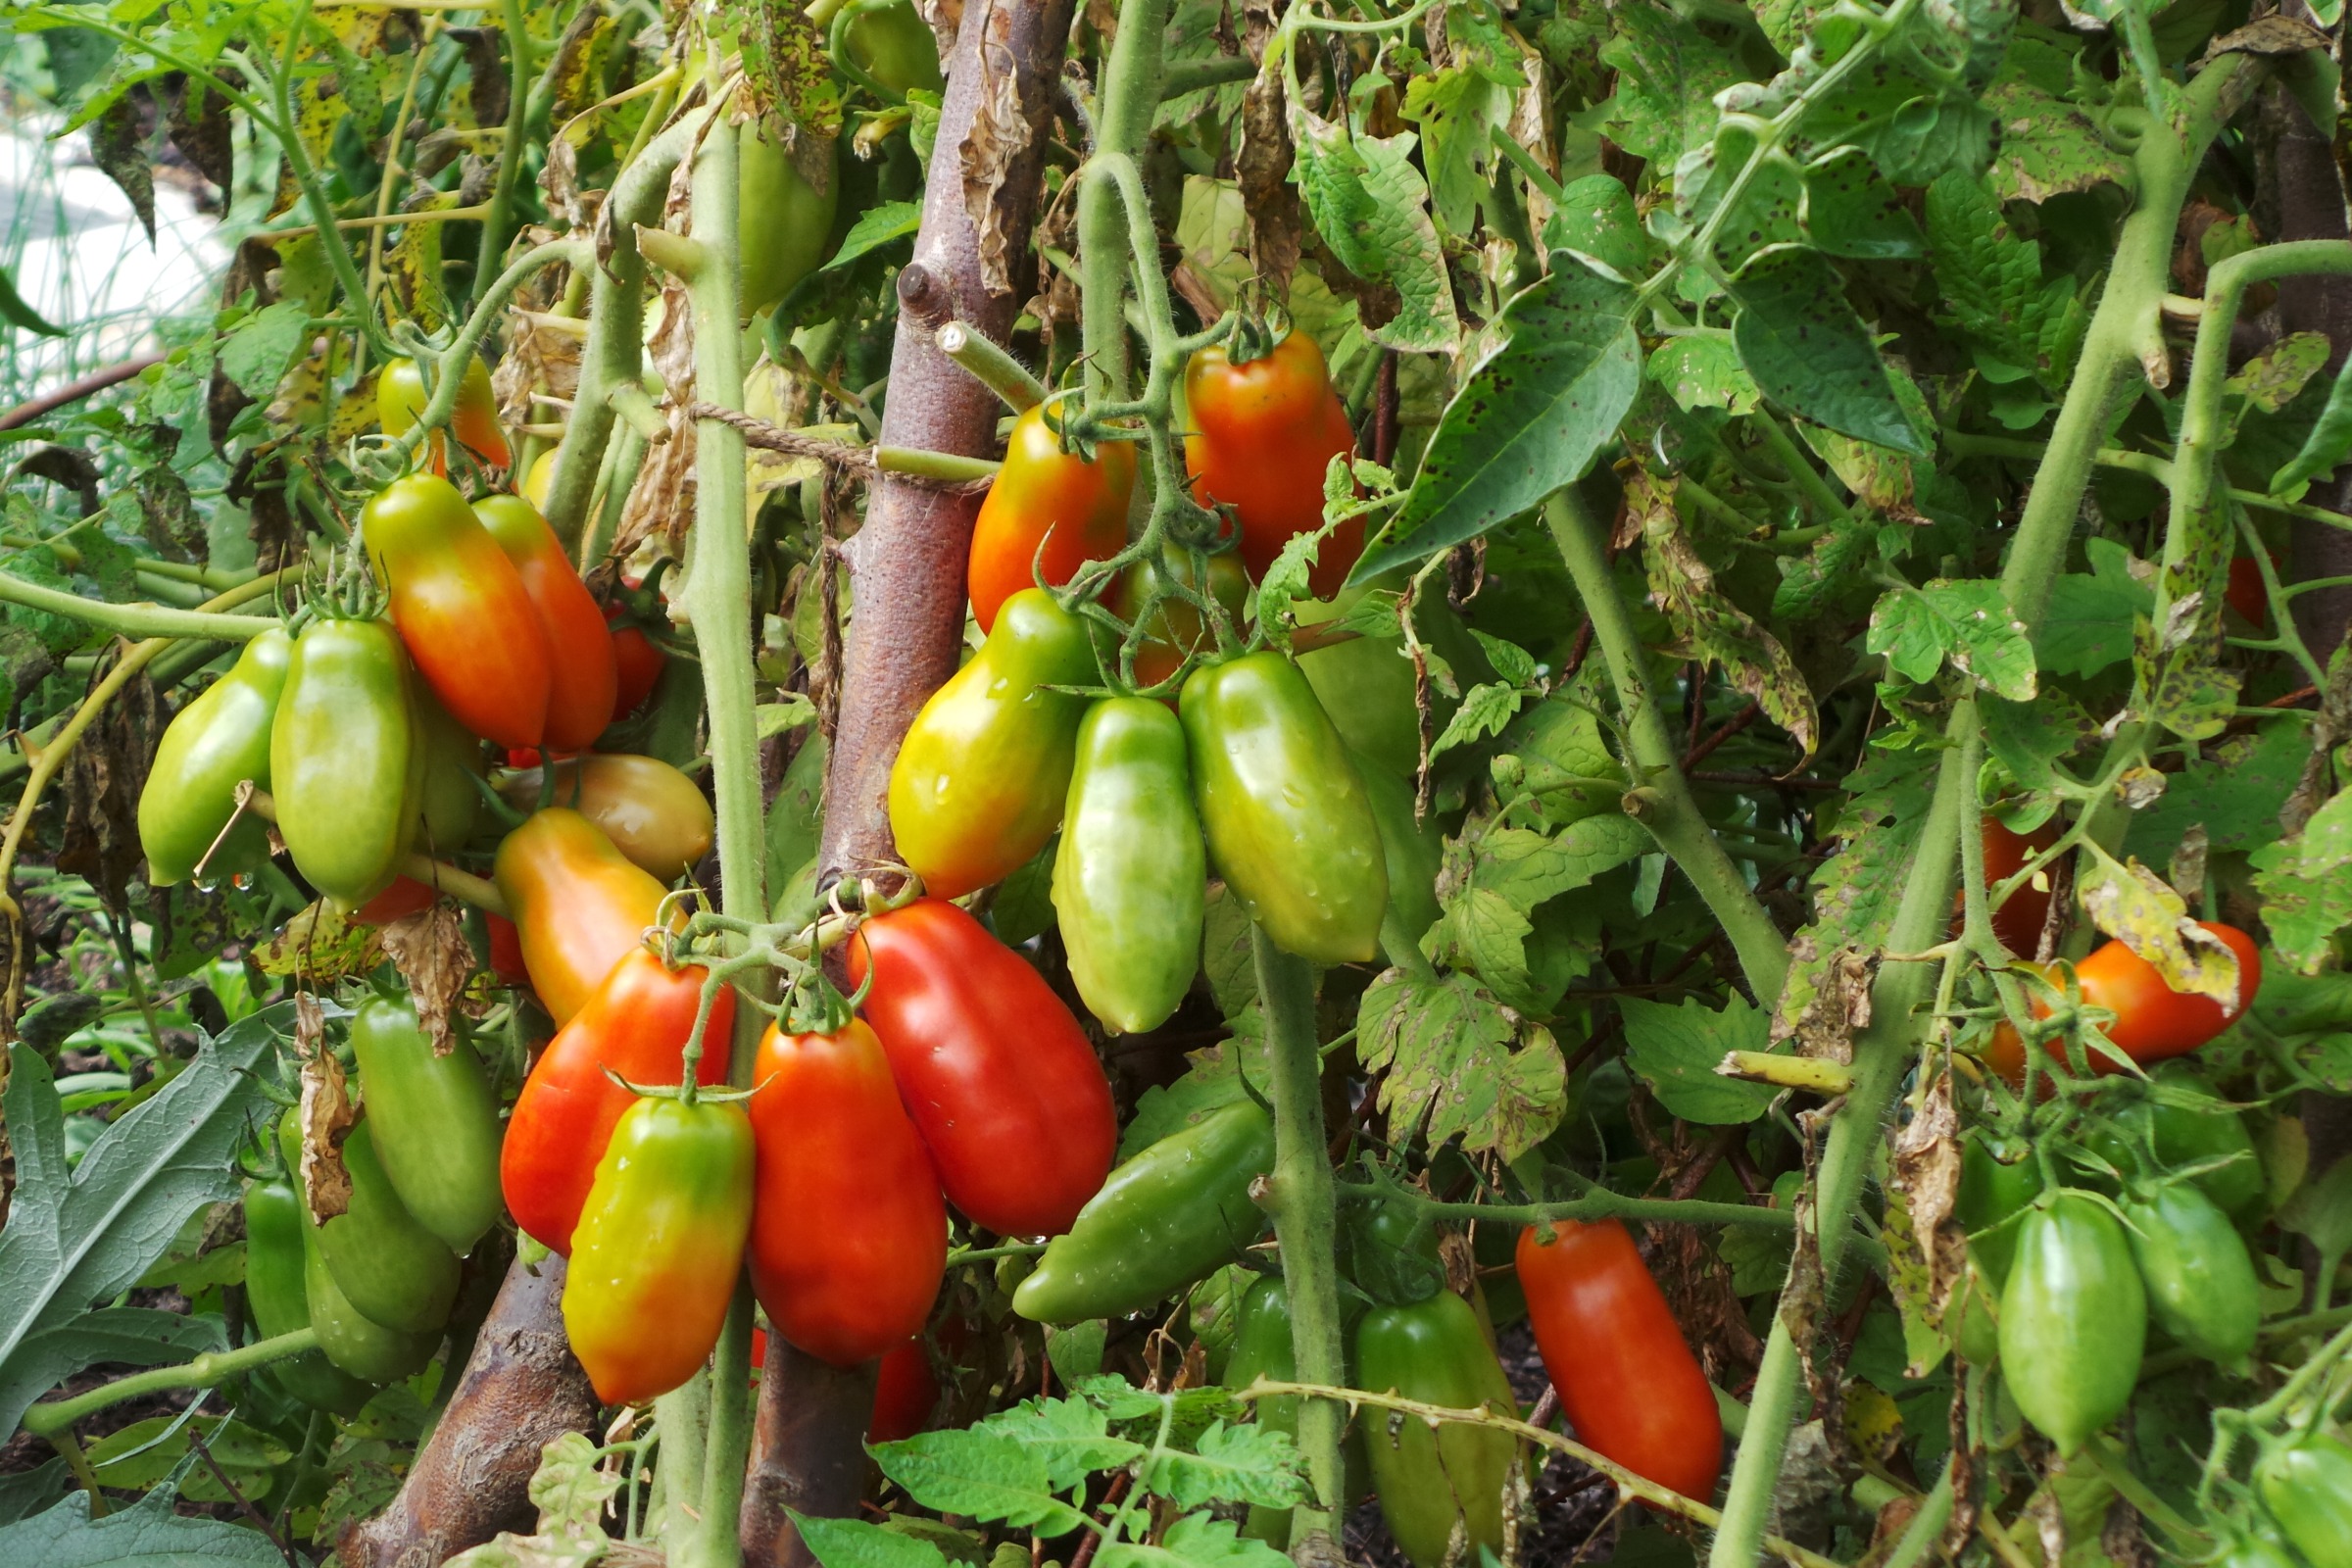
- Paste or Roma tomatoes: Plum Regal, La Roma, La Rosa, Nova, Roma, Viva Italia
- Cherry, grape, and pear tomatoes: Gardener’s Delight, Sweet 100, Super Sweet 100, Early Cherry, Sweet Million, Large Red Cherry, Yellow Pear, Fruity Orange, Sungold
- Tomato plants for containers: Tiny Tim, Red Robin, Patio Hybrid, Pixie Hybrid II, Small Fry, Husky Red Hybrid, Cherry Gold, Yellow Canary, Husky Gold Hybrid, Husky Pink Hybrid
- Heirloom Tomatoes: Brandywine, Yellow Brandywine, Big Rainbow, Black from Tula, Box Car Willie, Golden Queen, Green Zebra, Mr. Stripey, Striped German, Striped Roman, Moskvich
Using healthy plants
Because tomatoes require a long growing season, it is better to transplant plants in the spring rather than to direct seed tomatoes into your garden. This will give your tomatoes a head start and prolong the length of your harvest. You can start the seeds yourself or purchase plants at your local garden center or farmers’ market. Both options have advantages: starting your own seeds will allow you a greater selection of cultivars, while purchasing plants can save time and money.
Seed starting
If you grow your own tomato plants, sow seeds indoors or in a small greenhouse 4 to 8 weeks before you want to transplant them outdoors. Tomato seeds will germinate at 60˚F, however, the optimum soil temperature for germination is between 75 and 90˚F. Tomato seeds should be planted 1/8-inch deep and require 2 to 2½ square inches of soil per plant. Use clean trays and soilless or sterilized planting mix to avoid seedling diseases. Keep the soil moist but not wet. Seeds will germinate in 6 to 12 days.
Grafted tomatoes
Grafting tomatoes has become common in recent years. Grafting involves taking two tomato plants of different varieties and connecting them to form one plant with the best characteristics of each original plant. Most grafting uses the roots of a tomato plant variety that is resistant to one or more soil diseases and the top of a tomato plant variety with other desirable characteristics such as fruit flavor or size. Grafted tomatoes can be very useful if you have soilborne root diseases, but they are not significantly better for other growing situations. If you use grafted tomato plants, be careful not to plant them too deep. If the top part of the plant forms roots, the grafted plant will no longer be resistant to soil diseases.
Planting
The planting dates for tomatoes range from early May in much of southern Wisconsin to early June in the northern part of the state. Wait to plant until the chance for the last killing frost has passed and the soil temperature is at least 50˚F.
Before planting tomatoes, they must be prepared for outdoor conditions. This process is called setting out or hardening off. Begin by setting plants outside during the warmest part of the day 10 to 14 days before planting. Avoid exposing them to temperatures below 45˚F. Give the plants less water and do not fertilize them during this period to ready them for garden conditions.
When conditions are favorable and your plants have been hardened off, it is time to put them in the soil. Plants should be 4 to 6 inches tall at the time of planting. Avoid using plants that have already started to flower. A plant that is flowering puts its energy into fruit development instead of developing a strong root system, which is important to the plant’s long-term health and tomato yield. Water your plants thoroughly several hours before transplanting to be sure the plants are well hydrated and the soil adheres to the roots.
Providing the best possible growing conditions will help your plants to be healthy and productive. Tomatoes can be grown on many kinds of soil, but they do best on fertile, light, well-drained soils. Soil that is too fertile will produce lush green plants but little fruit. Avoid heavy clay, peat, or muck soils. The optimal soil pH is between 6.2 and 6.8, but tomatoes will tolerate a soil pH of 5.5 to 7.5 without significant harm to plant health or yield. Before planting, rototill or turn dry soil 7 to 8 inches deep and break up the soil to promote deep root growth. Raised beds can also be used to promote soil drainage and prevent soil compaction.
Plants should be planted in full sun 12 to 36 inches apart in the row depending on the variety and method of support (see table 1). More specific information can be found on the seed packet. Space rows 36 to 48 inches apart. Tomato plants can be planted deep to increase the root system. Mulch plants at the time of planting to minimize weed pressure.
Plant support
Tomato plants benefit from support, and planting is a good time to determine which type of support you will use. Sprawling, unsupported tomatoes require more space than supported tomatoes, and they have an increased chance of rot and disease. Sprawling tomatoes are also smaller than staked or trellised tomatoes, and they mature later.
Tomato cages are a common method of support for many gardeners. It is best to place cages early to avoid damaging the plants. Cages should be sunk into the ground to prevent them from blowing away. Caged tomatoes are smaller and ripen later in the season compared to other methods of support, but they are less likely to suffer from sunscald.
TABLE 1. Tomato plant spacing (inches)
| Growth Habit | Within the Row | Between Rows |
|---|---|---|
| Determinate | 12–24″ | 36–48″ |
| Indeterminate (staked) | 14–20″ | 36–48″ |
| Indeterminate (sprawling) | 24–36″ | 36–48″ |
Staked tomatoes
Staked tomatoes mature earlier and have larger, but fewer, fruits. Tomato stakes should be 6 feet tall, 1 inch square, and made of untreated wood. Metal stakes can also be used. Sink stakes into the ground 8 to 10 inches deep to provide solid support. Drive the stakes in early or at the time of planting to avoid damaging the roots. Tie a loop of strong cord loosely in a figure-eight pattern around the tomato and the stake at approximately 8- to 10-inch intervals throughout the growing season.
Trellises
Trellises are best suited to indeterminate tomato plants and have early fruits and good yields. Because the plant structure is more open, they also suffer from sunscald and cracking. There are many different methods of trellising to fit your space. Tomato trellises should be constructed before planting to avoid plant damage.
Growing season care
Once planted, tomatoes will need continued care to remain healthy. Plants may require occasional watering. Water plants at the time of planting and during dry periods. Tomato plants should be watered to a soil depth of 8 to 10 inches as needed. Avoid frequent shallow watering, as it will prevent good root development.
Limiting the weeds in your garden will also help to keep your plants vigorous. Regular shallow hoeing usually works best. Herbicides should be avoided to prevent damage to other garden plants.
Tomato plants may also need fertilization during the growing season. One or two applications of nitrogen should be sufficient for most soils, though some soils may also require phosphorus and potassium (see table 2). Apply ammonium nitrate or a similar nitrogen fertilizer early in July and then again two weeks later to ensure good growth. Excessive nitrogen fertilization will result in lush green plants but few tomatoes. A soil test will help you to accurately determine proper fertilization levels.
TABLE 2. Annual fertilization recommendations for tomatoes
| Organic Matter (%) | Nitrogen (lb/10 sq ft) | Phosphorus (lb/10 sq ft) | Potassium (lb/10 sq ft) |
|---|---|---|---|
| <2.0 | .53 | .15 | .68 |
| 2.0-4.9 | .45 | .15 | .68 |
| 5.0-10.0 | .38 | .15 | .68 |
| >10.0 | .30 | .15 | .68 |
Pruning
Pruning tomato plants can be useful in some situations. Determinate tomatoes do not require pruning and it does not benefit their overall health or productivity. However, indeterminate tomatoes that are staked or trellised do benefit from pruning.
To prune tomato plants, remove the sucker that develops immediately below the first fruit cluster and below. Suckers are the shoots or small branches that grow out of the area where the main stem and a branch meet. Remove shoots when they are small—4 inches or shorter. To remove a shoot, grasp it between your thumb and forefinger and bend the shoot back until it snaps. Avoid using pruners or other cutting tools because they can spread disease. Pruners can be used to prune larger woody shoots, but be sure to disinfect the pruners after each cut with a 10% bleach solution or alcohol. It is best to prune in the morning when plants are turgid (i.e., they have a lot of water in them) so that they snap more easily.
Plant diseases
The effects of plant diseases range from diminished appearance of the plant to reduced fruit yield to plant death. In general, it’s good practice to maintain a proper amount of moisture in the soil and to clean up plant debris to help prevent disease. What follows are some common plant diseases to watch for in tomato.
Early blight
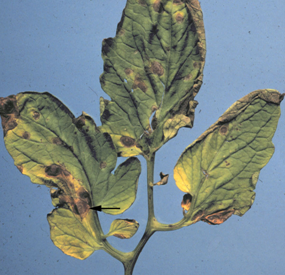
Early blight, caused by Alternaria solani, is a common and potentially serious disease of tomatoes. This fungus survives in plant debris or on infected plants. Early blight symptoms typically begin as plant canopies start to close. Denser foliage leads to high humidity and longer periods of leaf wetness that favor the disease.
The symptoms of early blight first appear at the base of affected plants, where roughly circular brown spots appear on leaves and stems. As these spots enlarge, concentric rings appear, giving the areas a target-like appearance. Often spots have a yellow halo. Eventually, multiple spots on a single leaf will merge, leading to extensive destruction of leaf tissue. Early blight can lead to total defoliation of lower leaves, damage to the tomato fruit, and even the death of an infected plant.
Once symptoms of early blight appear, control is difficult. Thinning of whole plants or removal of selected branches from individual plants may slow the disease by increasing airflow and thus reducing humidity and the length of time that leaves remain wet. Fungicides that contain copper or chlorothalonil and are labeled for use on vegetables may also provide control of early blight if they are carefully applied very early in the course of the disease (before symptoms develop is best) and on a regular basis throughout the rest of the growing season.
Early blight is best controlled using preventive measures. Destroy infested plants by burning or burying them. Rotate vegetables to different parts of your garden each year to avoid areas where infested debris (and thus spores of Alternaria solani) may be present. Use vegetable varieties that are resistant to early blight whenever possible. Increase spacing between plants to increase airflow and decrease humidity and foliage drying time. Mulch your garden with approximately one inch of a high-quality mulch, but do not over-mulch, as this can lead to wet soils that can contribute to increased humidity. Finally, where the disease has been a chronic problem, use of preventive applications of a copper- or chlorothalonil-containing fungicide labeled for use on vegetables may be warranted.
Septoria leaf spot
Septoria leaf spot is caused by the fungus Septoria lycopersici, which survives in plant debris or on infected plants. Septoria leaf spot symptoms typically begin as plant canopies start to close. Denser foliage leads to high humidity and longer periods of leaf wetness that favor the disease.
Septoria leaf spot symptoms first appear at the base of affected plants, where small (approximately ¼-inch diameter) spots appear on leaves and stems. These spots typically have a whitish center and a dark border. Eventually, multiple spots on a single leaf will merge, leading to extensive destruction of leaf tissue. Septoria leaf spot can lead to total defoliation of lower leaves and even the death of an infected plant.
Once symptoms of Septoria leaf spot appear, control is difficult. Thinning of whole plants or removal of selected branches from individual plants may slow the disease by increasing airflow and thus reducing humidity and the length of time that leaves remain wet. Fungicides that contain copper or chlorothalonil and are labeled for use on vegetables may also provide control of Septoria leaf spot if they are carefully applied very early in the course of the disease (before symptoms develop is best) and on a regular basis throughout the rest of the growing season.
Septoria leaf spot is best controlled using preventive measures. Destroy infested plants by burning or burying them. Rotate vegetables to different parts of your garden each year to avoid areas where infested debris (and thus spores of Septoria lycopersici) may be present. Use varieties resistant to Septoria leaf spot whenever possible. Increase spacing between plants to increase airflow and decrease humidity and foliage drying time. Mulch your garden with approximately one inch of a high-quality mulch, but do not over-mulch as this can lead to wet soils that can contribute to increased humidity. Finally, where the disease has been a chronic problem, use of preventive applications of a copper- or chlorothalonil-containing fungicide labeled for use on vegetables may be warranted.
Anthracnose
Anthracnose is a common and serious disease of tomato fruit caused by the fungus Colletotrichum coccodes. It overwinters in plant debris. Early in the growing season, spores from the soil splash on lower leaves of the tomato plant. Few symptoms develop on infected leaves, but splashing rain can carry spores from infected foliage to developing green fruit. Infected green fruit will not develop symptoms of anthracnose until the fruit begins to ripen.
Early symptoms appear on ripe fruit as small, slightly sunken, water-soaked circular spots. The lesions enlarge, become more depressed, and the middle darkens. Lesions on a single fruit often merge and result in large rotted areas. Ripe fruit is very susceptible to this fungus. As the fungus spreads within the fruit, a semi-soft decay occurs.
Because anthracnose is more prevalent on poorly drained soils, tomatoes should be planted on well-drained land. Three- to four-year crop rotations, which exclude crops in the Solanaceae family, are recommended to prevent a buildup of the fungus in soil. Several fungicides are registered for use on tomatoes to control anthracnose. Fungicide applications should begin when fruit are formed on the first cluster.
Late blight
Late blight is a destructive disease of tomatoes that can make tomato fruits inedible and even kill mature plants. This disease is caused by the fungus-like water mold Phytophthora infestans. Late blight can be blown into an area on prevailing winds or introduced on infected plants. It is unlikely to survive over the winter in Wisconsin soils. However, this disease can survive on infected plant material that remains alive through the winter.
On leaves of tomato, late blight begins as pale-green or olive-green areas that quickly enlarge to become brown black, water-soaked, and oily looking. Stems can also exhibit areas that are dark brown to black in color. If weather conditions are cool and wet, entire plants can collapse and die from late blight in 7 to 10 days. Tomato fruits with late blight develop large, often sunken, golden- to chocolate-brown, firm spots with distinct rings. Affected leaf, stem, or fruit tissue often eventually develops a white-gray, fuzzy look.
Plants showing symptoms of late blight cannot be saved and should be disposed of immediately to limit the spread of P. infestans to other plants. For home gardeners, the preferred method of disposal is to pull infected plants (roots and all) and place them in plastic bags. The bags should be left in the sun for a few days to make sure that plants, as well as any P. infestans, are totally killed. Bagged plants then can be put out for trash pickup. Diseased plants or plant parts should not be composted.
Consider planting tomato varieties that are resistant to late blight. The performance of these varieties may vary depending on the variant of late blight that is present in a particular growing season, as well as the weather conditions.
Fungicides also can be used to reduce the impact of late blight. However, fungicide applications must be made prior to the onset of disease to be effective. Fungicide applications are not needed during periods of hot, dry weather, as late blight is not likely to be active under these conditions. Fungicides are most likely to be useful during periods of cool, wet weather. If you decide to use fungicides, select a product that is labeled for use on tomatoes and has chlorothalonil or copper as the active ingredient. Certain—but not all—copper-containing products can be used for organic vegetable production.
Fusarium and Verticillium wilts
Fusarium and Verticillium wilts are soilborne diseases that cause plants to wilt, then gradually turn yellow and die. Wilts can be brought into the garden through infected seed or transplants. Wilt diseases can remain in the soil for many years and cannot be effectively controlled with fungicides. Plant wilt-resistant cultivars and follow a long plant rotation of 4 to 6 years that does not include crops susceptible to the disease.
Plant disorders
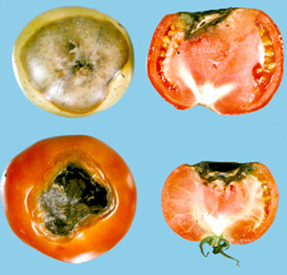
Tomato plants also have a variety of physiological disorders that affect primarily fruit development. These disorders cause a variety of symptoms from misshapen fruit to rot and include catfacing, blossom end rot, and growth cracks. Some of these disorders can be prevented with proper plant care. For more information about tomato disorders, see the Extension publication Tomato Disorder: Physiological Fruit Problems.
Insect damage
Some insects can cause damage to tomato leaves, fruit, or stems. The type and location of the damage will help you to identify the pest. Leaf feeders include cabbage loopers, Colorado potato beetle, hornworms, aphids, and flea beetles. Insects that feed primarily on the fruit are tomato fruitworm and stink bugs. The black cutworm and variegated cutworm feed on seedlings and the lower stems of plants. For more information about insect pests in tomato, see the Extension publication Managing Insects in the Home Vegetable Garden (A2088).
Harvesting
For fresh use or for canning, pick tomatoes that are fully ripe and free from damage. This will offer the best flavor and quality. Use smooth, clean picking containers to harvest fruit. Store tomato fruit between 55˚ and 70˚F. Avoid refrigeration to maintain flavor.
The yield of tomatoes per plant will vary with location, season, and variety. Gardeners in southern and central Wisconsin can expect 12 to 15 pounds of tomatoes per plant. In northern Wisconsin, 7 to 9 pounds per plant is more common.
Season extension
Home gardeners can often stretch the tomato harvest season by several weeks beyond the first light frost by using plastic tunnels or floating row covers. Remove row covers and tunnels during the day to avoid overheating the plants.
Sprinkler irrigation will also protect tomatoes from frost. Start irrigation before temperatures drop below 32˚F and continue until the temperature is again above 32˚F and the ice has melted from the plants. Watering tomato plants before the first frost will keep soil temperatures warmer and may offer some protection from frost.
It is also possible to harvest the remaining tomato fruits that are still green as long as they are mature. They will continue to ripen after they are picked. Store mature, unripe fruit in a single layer in a warm, dark location with some air movement. As with ripe tomatoes, avoid storing them at temperatures below 55˚F to avoid poor flavor.
Pesticide labels change often
Always read the pesticide label prior to use. Persons using pesticides are responsible for their use according to current label directions of the manufacturer.




 Tomato Pruning
 Blossom End Rot
 Growing Tomatoes, Peppers, and Eggplants in Wisconsin
 Early Blight


